Followers

Showing posts with label Anime. Show all posts

April 02, 2022

April 2022 Chibis/Anime New Release


Hello and welcome to the April Chibis/Anime New Release. This month we have some fabulous images to share with you. You can find these images at the Stampers Delights Store


Chibis Tea Cup Cutie Cat Boy


Chibis Free Hugs


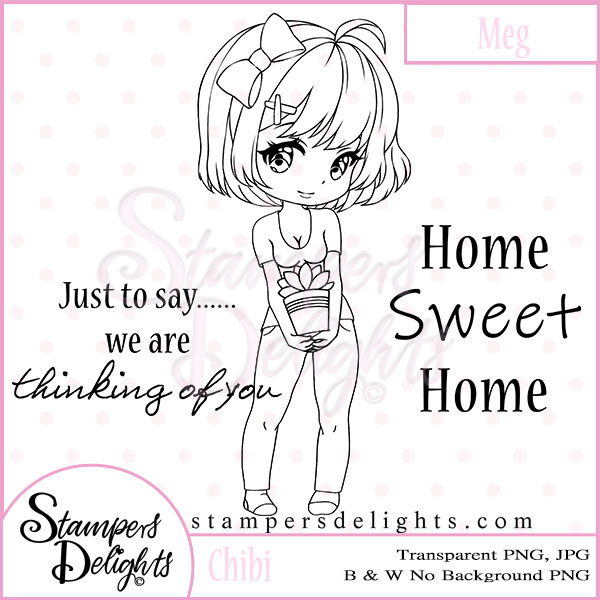
Chibis Meg


Anime Kelly


Now I'd like to share with you our Design Teams amazing creations using these new images. 


Created By Cindy Van Der Velde


Created By Helen Nile


Created By Jennifer Lewis 


Created By Judy Ellender VanZandt 


Created By Mollie Smith 


Created By Sharon Smith


Created By Vannessa Hasty 


Created By Victoria Rowson 


Thank you ladies for your beautiful creations. I hope they have inspired you to stop by the Stampers Delights Store to join in with the creativeness. To see more inspiration creations please visit the Stampers Delights Facebook Group. Thank you for visiting today.


January 07, 2022

January 2022 Anime Team Highlight


Hello and welcome to the Anime Teams Highlight post. This month there is a sale over at Stampers Delights. 


Our teams have created some fabulous inspiration creations using a image of there choice.


Created By Marj Banzales


Created By Victoria Rowson


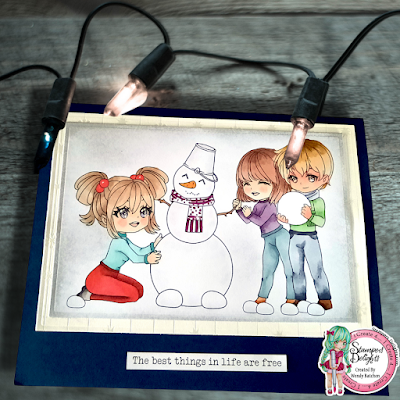
Created By Wendy Batchen

Amazing projects ladies! 

Please head over to the Stampers Delights Facebook Group if you'd like to see more inspiration and to join in with our monthly Progressive Challenge

Thank you so much for joining us today. Please stop by again tomorrow for more crafting fun. 


December 11, 2021

Christamas Ornaments - Color Tutorial (two copic colors for each color)


Hi, 

Eivor here again, and today I am going to show you a Christmas Ornament with a image that I colored with less numbers of copics. I think it is good to show that you don't always need to have so many copics. 

I have made my ornament like a Christmas card, it means that I can send it to a friend to wish her Merry Christmas, and then she can hang it on the Christmas tree as a decoration. 
On my Christmas ornament I have used the beautiful stamp Anime Xmas Wreath. I think it is a beautiful stamp, perfekt for Christmas.

So to my tutorial...I have already colored her face and hair, so my tutorial is on the wreath, the ribbon and her top. 
We start with the wreath and the green colors. I started with G17 and I color around the sides and where I like it to be darkest.

The next, second color and also the last, is YG06. With this I go over G17 and exteding and coloring the hole space. After that I go back to G17, color the side/edges and then I take YG06 again and go over the hole space again. 

So to the ribbons and the red colors. I start with R29, go around the edges.

My next color is R24 and with that I go over R29, extending and then color the hole space. I also do the same as with the green. Go over the space with the colors again. First R29 and the R24 as the first time.

I also enclose photo on how I colored the bow. I used same red colors, R29 and R24 and did the same way. R29 where I wanted the bow a little darker.

Then it is time for the R24, extending and also coloring the hole space. Going over the bow once again first with R29 and then R24

 For the top I started with YR24.

My second color is Y15 and I am extending a little. As you can see I left some white space and I do that to get some more darker spaces. So now I go over the image again with YR24 and then Y15 and now I'm going over the hole space/top and filling the white space.

To make the ornaments I cut the image out with a round die, then I used another die with bubbly edge and cut two pices in red cardstock. I glued the red and white ribbon between the red cardstocks and then I glued the image on one side. 

Below is the backside of the ornament with the greeting "Merry Christmas", I will write mine and my familys name below when we send the card, thats why it is so white at this moment.

Hope you all liked my tutorial, and hope I can inspired anyone to try copics now when you see that you can create lovely colors with only two copics for each color. 

Thank you for stopping by today and hope you remember to check out our Stampers Delights Fan Group and also that you will join us in the mountly Progressive FB Challenge


December 08, 2021

A Early Thrifty Thursday for December at Stampers Delights


Welcome back to Stampers Delights Thrifty Thursday for December.  Hope everyone is beginning to enjoy the holiday season.  This month the team is creating with Christmas images.  The team has created beautiful projects this month with lots of inspiration.  Let's take a look at what they have created.

Don't forget all the images are on sale!


Anime Dixie Fairy created by Mollie Smith


Chibi Snowball Fight created by Helen Nile


Anime Xmas Wreath 2 created by Priyadarshini Ramakrish


Chibis Xmas Scene created by Wendy Batchen


Anime Xmas Wreath 2 created by Judy Ellender VanZandt

Aren't the projects just so adorable?

We also want to tell you that we are currently holding a design team call, so if you want to join our Design Team and work with lovely digital imagas, please check details below and contact us. 


So to a little reminder...Our Progressive Facebook Challange is live and off course we would like you to join. Please check it out, it is a lovely images we are working with in December.


They are all available for purchase in the Stampers Delights store.  

Important Links for You!


See you next month!  

Happy Holidays!


December 01, 2021

December 2021 Progressive Facebook Challenge


Our Progressive Facebook Challenge for December is live and we hope you will join us! It runs every month in the Stampers Delights Facebook Fan Group.

In December our freebie is a lovely stamp called "Holiday Cheer".


THE FACEBOOK PROGRESSIVE CHALLENGE WILL START ON THE 1ST DECEMBER AND RUN THROUGH UNTIL 31ST DECEMBER!

How does it work?
- Each month on the 1st you will receive an email that will notify you of a new post which will be pinned to the top of the Facebook page. 

- You will also see a catagory which says "Products", then chosen image for the given month will be there ready for you to download. 

- This product will disappear on the last date of that given month and on the 1st of the next month, another image will be available and the occasional bonus when we have any events.

PLEASE NOTE we will still be monitoring participation.

PLEASE JOIN HERE:

What do I need to do?
- Create with the image. Use one of Stampers Delights image(s) your own, purchase or freebie. 

- You can create any typ of full projects using it.

- You can post 3 entries and all need to be NEWLY created. 

- Upload your project into the pinned monthly album in Stampers Delights Fan Group.
 
- It would be lovely if you could share your project within other groups as the more people that play the better the prizes!! 

To keep receiving each months image all you have to do is create with it. 

You will be given an entry number in the comments and at the end of the month you could be one of the random winners who get bragging rights, and yes there are prizes!

What happens if LIFE HAPPENS?
If for any reasons you are suddenly really busy that month which I know can happend and note able to submit the project, alla you have to do to jump back in is: 
- Create with the image you was given and add to the new months album. 
- Request the new image that month.

What if I do not want to create with last months image but have to create with this month?
- If you just have to create with the new one you can go to my store and purchase that month image for just £1.50 and create as normal. 

We have a fun caring group with everyone at different stages of their creative journey, very supportive with ZERO tolerance to DRAMA.

PLEASE JOIN HERE:

Now lets check out the inspirations from our talented Design Team.

Created by Jennifer Lewis


Created by Mieke Duckers


Created by Helen Nile


Created by Marj Banzales


Created by Wendy Batchen


Thank you ladies for your lovely and beautifyl creations!

We hope (and think) that the Design Team inspired you to get creative and that you join us in the December Challenge.

Thank you so much for stopping by today and don't forgett to visit us tomorrow for more inspiration.

November 19, 2021

Box In A Bag Tutorial

Good evening everyone and welcome to the first of my two tutorial posts for this month's new releases. 

For this project, I have used the gorgeous Anime Secret Santa digi stamp and the accompanying sentiment. 


I have made a Bag in a Box, which is perfect for small gifts this time of year. You could also reuse the bag as a Christmas tree decoration as well. 

For this project, you will need:
  • a 4.5 inch square for the base
  • a piece of patterned paper measuring 11 inches x 6.5 inches (or whatever height you prefer)
  • a piece of punched or die cut card measuring 11 inches long
  • some ribbons
  • a tab (I used a tag die and folded it in half before adding a punch out die for the ribbons to go through)
  • your stamped and coloured image
  • oval die cuts for the image to go on (or whatever shape you want)
  • the die cut sentiment and card to layer on


First you need to score at the 1 inch mark on each side of the card square. You also need to score diagonally in each corner. 


Fold and burnish using a bone folder and glue the corners together to make the square base. 


Add some double sided tape along one long and one short edge only of the patterned paper. Line up the bottom of your box against the patterned paper and roll the paper around each side, ensuring it is stuck well to the base. Remove the backing from the short side and attach to the start of the patterned paper to close the bag. 


This is how it will look after you have finished this step.


Now it's time to decorate... I added the punched strip to the bottom with the green strip of card in the middle. You could easily use ribbon here instead of card. I added my digi stamp to the oval die cuts and attached with glue on just the centre of the die to the bag. I added one of the tab dies to each side of the bag and closed it using two different ribbons. 


On the back, I added the sentiment after attaching it to some red card and fussy cutting the shape out. (The die I used didn't have a larger size for mounting).


I hope you have enjoyed this tutorial. We would love to see all your projects in the Stamper Delights Fan Facebook Group, so do share them there! 

You can read more about this project including the Copic combos I used on my blogpost here

Sponsorship Design Team

  Hey friends! Hope you all are doing great! We have new projects to share with you today and I hope you will visit each of them and give th...