Followers

Showing posts with label Halloween. Show all posts

October 14, 2021

October Thrifty Thursday


Welcome back to another Thrifty Thursday.  This month we are again focusing on Halloween.  The creations created this month are amazing.  If you get a chance, please visit the design teams blogs and leave them some love.

If you would like more inspiration head on over to Stampers Delights FB group or blog.  There are so many informative posts on our blog.

Here are some quick links for you before we take a look at this months creations.


Here are this months Thrifty Thursday creations.


Created by Judy Van Zandt


Created by Wendy Batchen


Created by Mieke Duckers


Created by Mollie Smith


Created by Helen Nile


Created by Jane Proffitt


Thank you so much for taking time out in your busy day to visit us today.

Thanks to the Design Team for these amazing creations!!

We hope you were inspired today and get creative!! 
Please visit Stampers Delights Fan Group at Facebook for more inspiration and also for our monthly Progressive FB Challenge for October. 

October 01, 2021

October 2021 Progressive Facebook Challenge

 
Our Progressive Facebook Challenge for October is live and of course we hope you will join us! It runs every month in the Stampers Delights Facebook Fan Group.

In October we have this cute freebie Harvest wishes to play with. 


THE FACEBOOK PROGRESSIVE CHALLENGE WILL STARTS ON 1ST OCTOBER AND RUN THROUGH UNTIL 31 OCTOBER! 

How does it work?
- Each month on the 1st you will receive an email that will notify you of a new post which will be pinned to the top of the Facebook page. 

- You will also see a category which says "Products", then chosen image for the given month will be there ready for you to download.

- This product will disappear on the last date of that given month and on the 1st of the next month, another image will be available and the occasional bonus when we have any events.

PLEASE NOTE we will still be monitoring participation.

PLEASE JOIN HERE: 

What do i need to do?
- Create with the image. Use one of Stampers Delights image (s) you own, purchase or freebie.

- You can create any type of full project using it.

- You can post 3 entries and all need to be NEWLY created.

- Upload you project into the pinned monthly album in Stampers Delights Fan Group.

- It would be lovely if you could share your project within other groups as the more people that play the better the prizes!!

To keep receiving each months images all you have to do is create with it.

You will be given an entry number in the comments and at the end of the month you could be one of the random winners who get bragging rights, and yes there are prizes!!

What happens if LIFE HAPPENS
If for any reason you are suddenly really busy that month which I know can happen and not able to submit the project, all you have to do to jump back in is:

- Create with the image you was given and add to the new months album.

- Request the new image that month.

What if I do not want to create with last months image but have to create with this month?
- If you just have to create with the new one you can go to my store and purchase that month image for just £1.50 and create as normal.

We have a fun caring group with everyone at different stages of their creative journey but very supportive with ZERO tolerance to DRAMA.

PLEASE JOIN HERE:

Now to the inspiration from our talented Design Team!

Designed by Stacey Tomkowiak

Designed by Jennifer Lewis

Designed by Helen Nile

Designed by Wendy Batchen

Designed by Mieke Duckers

Created by Sharon Smith

Thank you ladies for your lovely and beautiful creations!!

We now hope the design team inspired you to get creative and that you join the October challenge.

Thank you so much for stopping by today!

September 16, 2021

September Thrifty Thursday


Hello my crafty friends and welcome back to another Thrifty Thursday Deals.  This week we are creating with some adorable Halloween images.  The design team has done an amazing job again this month.  It is really easy to create when the images are amazing!

Before we take a look at this weeks creations here are some Quick Links for you.

Stampers Delights Blog

Stampers Delights Digital Store

Stampers Delights Clear Stamps

Stampers Delights FB Page

FB Progressive Challenge

Pinterest and Instagram links can be found at the top of the page.

Let's take a look at the awesome projects!


Created by Helen Nile


Created by Mieke Duckers


Created by Mollie Smith


Created by Wendy Batchen


Created by Jane Proffitt


PLEASE READ, WE HAVE SOME CHANGES!!!!
THIS FACEBOOK PROGRESSIVE CHALLENGE WILL START ON 2nd July AND RUN THROUGH WEDNESDAY 31st July.


We are trying things a little different this month, which I hope will help streamline and automate our growing Progressive Challenge.
Wendy is doing a fantastic job giving out the image each month but I feel it is time to free her up a little, although she will still be helping to host and manage participation, so this is why we have started a free membership.
HOW DOES IT WORK?
Each month on the 1st you will receive an email that will notify you of a new post which will be pinned to the top of the facebook page. You will also see a category which says "Products", the chosen image for the given month will be there ready for you to download, the product will disappear on the last date of that given month and on the 1st of the next month, another image will be available and the occasional bonus when we have any events.
PLEASE NOTE we will still be monitoring participation.
Nothing has changed with the rules. We will have special promotions that can also be used in the challenge especially picked out by the Stampers Delights Design Team, you can find the category in store. Don't forget to check out our fabulous images in store here https://stampersdelights.com/.../ALL_DIGITAL_STAMPS...

Thank you for visiting and we will see you next month!


August 21, 2021

Hallowe'en Trick or Treat Box Using Kawaii Halloween Pal Frankie Stein

 
Good evening all! DT Vannessa here again with a quick tutorial to show you how to make a cute treat box perfect for Hallowe'en. 

For this project I have used the adorable Kawaii Halloween Pal Frankie Stein clear stamp set from this month's new releases. Be sure to check out all the fabulous images, both in digi stamp and clear stamp formats! 

To start my treat box I am using a box template and some blackberry card...


After drawing round the template, I cut it out and score the fold lines using a small ball tool.


Using my bone folder, I crease all the fold lines.


I am going to make this treat box into a haunted house so when I add my stamped image it will look like he is going trick-or-treating, so I need lots of roof pieces, windows and some cute ghosties.


Making sure that the front of the box is on one of the sides with the flat top, I glue all my die cuts in to position.


I am now ready to add my cute Halloween Pal Frankie Stein. You can find the Copic combos I used for him so my blogpost here.


I then glued the treat box together and added Frankie on the front with the door. 


This is one side view...


I also added the Trick or Treat sentiment from the stamp set to the back.


Such a fun cute project to make and it was a quick make too, so could be easily replicated if you have several people to hand out Hallowe'en treats to. You could also use this idea to make a Christmas house and have a Santa image on the front delivering his presents. 

I hope you have enjoyed this tutorial. We would love to see any of your Stampers delights projects in our Facebook group

August 20, 2021

Layered Stamp Tutorial Using Chibi Too Cute To Spook

Good evening everyone. DT Vannessa here with another of my tutorial featuring some of the gorgeous new clear stamp releases from Stampers Delights

Today I am going to show you how I have made a layered image using the Chibi Too Cute To Spook clear stamp set to add to my Hallowe'en card.

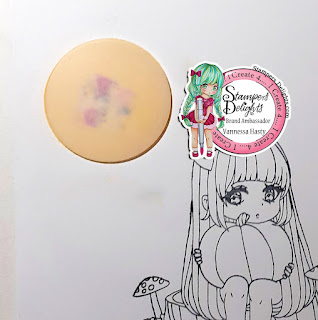
For this project you need to stamp 5 of the same image with one of them being stamped onto the card for the blended background. This one can be set aside for now though. 


On this image, you can see that there are various pieces that sit more towards the front or more towards the back. The idea of this layered image creates more of a 3D effect, so not everything needs to be coloured in detail as some parts will not be visible until a particular layer. For that reason I colour the layered sections in grey using my W2 Copic marker.

On this first layer I have coloured just the left mushroom and the right stalk as these sit the furthest back in this image.


For my second layer, I don't need the mushroom on the left or the stalk on the right, as they will be cut off and therefore don't need colouring at all. I just coloured the tree stump and leaves on this one and everything else was coloured in grey again.


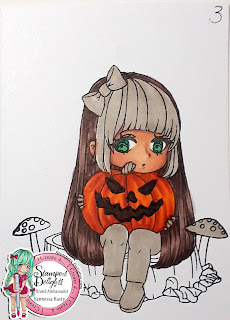
On layer 3, we are now starting to colour in the actual girl so her hair, the pumpkin and her face needed some colour. I did forget to stamp the Jack O' Lantern face on initially so added it here on this layer. The white sections are the parts that will be cut from this layer.


On the next layer I coloured the remaining parts, so her trousers and boots, the right top part of the mushroom, the stalk, her hands, her front section of hair and her bow. I didn't like how the first attempt on the bow came out, so I re-stamped it and tried again! 


Now comes the tricky bit, to fussy cut all the different layers out. The tiny pieces such as her fingers are really fiddly! If these bits are too tiny for you, you can always leave them out and just colour them in on the third layer instead. 


Using foam tape, I layered each section in place and you can see here how the 3D effect has taken place and really makes her stand out! 


This is the side view of the stamped image so you can see all the layers.


And now we move on the background for which I am using some stencils and my Distress Oxide inks. Using this stencil I am adding a moon using Squeezed Lemonade, Mustard Seed and Fossilized Amber. 


The moon looks very bright once it has been inked, but this will soon dull later on.


Using the pull out pieces from that same stencil I cover up the moon for now using a piece of washi tape again, doubled over to act as double sided tape. This allows the inks to go around the moon, without me making any mistakes and getting ink on it when I don't any! 


After adding lots of layers of ink until I got the shades I wanted, I added some stars from another stencil in white ink, so they were not stark white, but a dulled down version. I then added a little bit of grey ink to my moon to look like there are some clouds going across it. 


I then cut out some grass, a spooky tree and spooky fence to add to my scene. The grass blades have been inked as well in the same colour as the card. 


These are the layers for my card - a green card base, a black mount and my inked background.


Next up...add the die cuts. I left the gap in the fence as this is where my stamped image will go. Even with all the inking for the sky, I can just see where the stamp was so I know where to position everything in the scene.


Adding my stamped image and some white paint dots for more stars completes the card. 


And a side view of the card so you can still see those layers of the stamped image. 


I hope you have enjoyed this tutorial. We would love to see any of your Stampers delights projects using this technique in our Facebook group. Hope you will join us! 

You can find the Copic combos I used on this card on my blog post here.


Sponsorship Design Team

  Hey friends! Hope you all are doing great! We have new projects to share with you today and I hope you will visit each of them and give th...