Good evening everyone and welcome to my final tutorial of 2021. I can't believe how quickly this year has flown by. It definitely has had its ups and downs, hasn't it?! Hopefully 2022 will be a much better year for us all!
Anyway...on to my project. For this one, I thought I would make one of my free standing calendars that I have been making for years. They are perfect for gifts and can be made in whatever size of shape you wish!
I have used the gorgeous Chibi Happy Birthday for this image and went for a favourite combo of mine - pink and light brown.
To start, I have cut all the card and patterned papers ready, but the base of the calendar will be a 7 inch square. Therefore, I have cut 1 piece of card at 7 x 7.5 inches and another at 7 x 9 inches. Once joined together, these will make the stand for the calendar.
First, score the 7 x 7.5 inch piece of card at 7 inches.
On the other piece, score at 7, 7 3/4 and 8.5 inches. Fold the middle score line in the opposite direction to the other two folds - they should be valley and the middle score line should be a mountain fold.
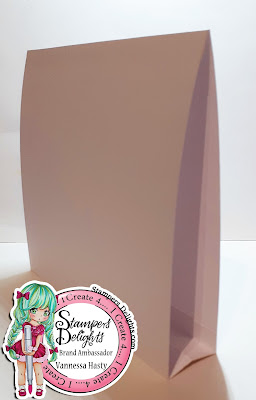
Now join the two pieces together with a fold at each end. The double folded piece will be at the bottom of the calendar and the single fold will be at the top.
This is the side view... If you want a wider bottom section, then you just need to increase the size of the folded part.
That is the base of the calendar made and now it's time to decorate... I added my layers of patterned papers and ribbon, but felt it needed something more so added some flowers and pearls to it as well.
And the side view again...
I hope you enjoyed this tutorial. I would love to see your own version, so do come on over to the Stampers Delights Facebook Group and share your projects with us all there!
You can read more about this calendar and the Copic combos I have used to colour my image over on my blogpost here.


No comments:
Post a Comment