Today I am going to show you how I have made a layered image using the Chibi Too Cute To Spook clear stamp set to add to my Hallowe'en card.
For this project you need to stamp 5 of the same image with one of them being stamped onto the card for the blended background. This one can be set aside for now though.
On this image, you can see that there are various pieces that sit more towards the front or more towards the back. The idea of this layered image creates more of a 3D effect, so not everything needs to be coloured in detail as some parts will not be visible until a particular layer. For that reason I colour the layered sections in grey using my W2 Copic marker.
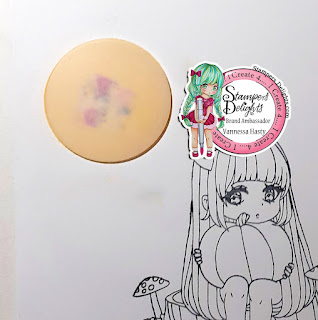
On this first layer I have coloured just the left mushroom and the right stalk as these sit the furthest back in this image.
For my second layer, I don't need the mushroom on the left or the stalk on the right, as they will be cut off and therefore don't need colouring at all. I just coloured the tree stump and leaves on this one and everything else was coloured in grey again.
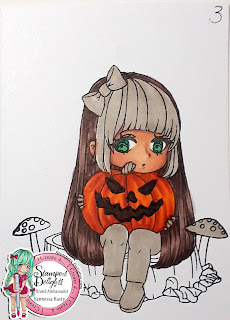
On layer 3, we are now starting to colour in the actual girl so her hair, the pumpkin and her face needed some colour. I did forget to stamp the Jack O' Lantern face on initially so added it here on this layer. The white sections are the parts that will be cut from this layer.
On the next layer I coloured the remaining parts, so her trousers and boots, the right top part of the mushroom, the stalk, her hands, her front section of hair and her bow. I didn't like how the first attempt on the bow came out, so I re-stamped it and tried again!
Now comes the tricky bit, to fussy cut all the different layers out. The tiny pieces such as her fingers are really fiddly! If these bits are too tiny for you, you can always leave them out and just colour them in on the third layer instead.
Using foam tape, I layered each section in place and you can see here how the 3D effect has taken place and really makes her stand out!
This is the side view of the stamped image so you can see all the layers.
And now we move on the background for which I am using some stencils and my Distress Oxide inks. Using this stencil I am adding a moon using Squeezed Lemonade, Mustard Seed and Fossilized Amber.
The moon looks very bright once it has been inked, but this will soon dull later on.
Using the pull out pieces from that same stencil I cover up the moon for now using a piece of washi tape again, doubled over to act as double sided tape. This allows the inks to go around the moon, without me making any mistakes and getting ink on it when I don't any!
After adding lots of layers of ink until I got the shades I wanted, I added some stars from another stencil in white ink, so they were not stark white, but a dulled down version. I then added a little bit of grey ink to my moon to look like there are some clouds going across it.
I then cut out some grass, a spooky tree and spooky fence to add to my scene. The grass blades have been inked as well in the same colour as the card.
These are the layers for my card - a green card base, a black mount and my inked background.
Next up...add the die cuts. I left the gap in the fence as this is where my stamped image will go. Even with all the inking for the sky, I can just see where the stamp was so I know where to position everything in the scene.
Adding my stamped image and some white paint dots for more stars completes the card.
And a side view of the card so you can still see those layers of the stamped image.
I hope you have enjoyed this tutorial. We would love to see any of your Stampers delights projects using this technique in our Facebook group. Hope you will join us!
You can find the Copic combos I used on this card on my blog post here.


No comments:
Post a Comment